
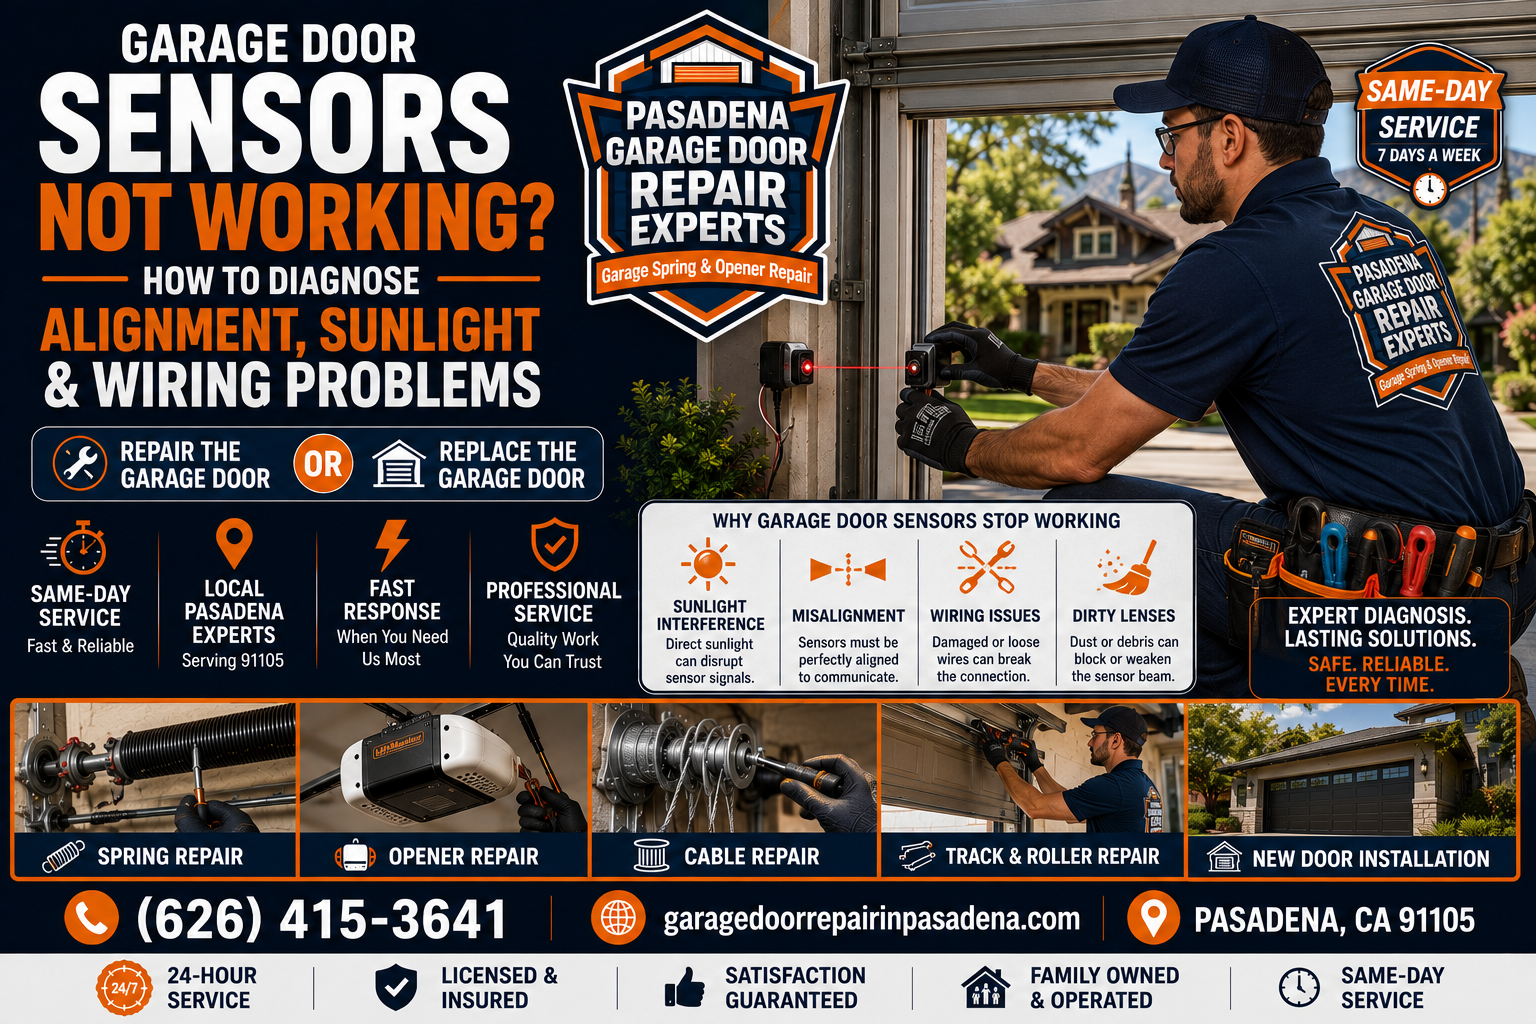
Garage Door Sensors Not Working? How to Diagnose Alignment, Sunlight and Wiring Problems
A garage door that opens normally but refuses to close often points homeowners toward the safety reversing sensors mounted near the bottom of the garage-door opening. Those sensors can stop normal closing when the beam is blocked, the photo eyes are misaligned, wiring is damaged, a bracket has shifted, sunlight interferes with the receiving sensor, or one of the sensor components is no longer operating correctly.
The challenge is that several of these conditions can produce nearly the same symptom. A garage door may remain fully open, start closing and then reverse, operate from one control but not another, or display blinking sensor or opener lights. Accurate troubleshooting means identifying which part of the safety-sensor system is actually causing the interruption.
This guide from Pasadena Garage Door Repair Experts explains how Pasadena homeowners can diagnose common garage door sensor alignment, sunlight and wiring problems without bypassing required safety equipment or replacing parts before the cause is understood.
Why Are My Garage Door Sensors Not Working?
Garage door safety sensors may stop normal closing because the invisible beam is blocked, the two photo eyes are no longer aligned, a sensor lens is dirty, sunlight is interfering with the receiving sensor, low-voltage wiring is loose or damaged, a sensor bracket has shifted, the sensor is not receiving power, or one of the sensors has failed.
One of the strongest clues is a garage door that opens normally but refuses to close with the remote or reverses shortly after downward travel begins. Many opener systems also use indicator lights on the sensors and diagnostic lights or codes on the opener to help distinguish obstruction, alignment and wiring problems.
Homeowners can safely clear obvious obstructions, clean the exterior sensor lenses, observe the indicator LEDs, look for obvious wire damage and check whether the two sensors still face each other.
Do not bypass the sensors, permanently tape over them, increase opener force to defeat a closing problem, or modify wiring without following the instructions for the specific opener system.
If one sensor remains dark, alignment cannot be maintained, wiring is damaged, the opener continues reporting a sensor fault or the garage door itself is becoming crooked or mechanically unstable, further diagnosis makes sense before additional door cycles are attempted.
How Garage Door Safety Sensors Work
Automatic residential garage door openers use several different systems to control door movement. One of the most important is the safety reversing sensor system located near the floor.
On many residential systems, two small photo-eye units are mounted on opposite sides of the garage-door opening. One functions as a sending sensor and transmits an invisible infrared beam across the opening. The other functions as a receiving sensor and monitors that beam.
When the beam reaches the receiver normally, the opener receives information indicating that the monitored path is clear.
When something interrupts the beam while the garage door is attempting to close, the opener's safety logic can stop or reverse downward movement rather than simply continue closing.
This is why a sensor problem frequently affects closing while opening still works normally.
The U.S. Consumer Product Safety Commission explains that automatic residential garage-door operators are subject to the federal safety standard in 16 CFR Part 1211 for automatic residential garage door operators .
The practical point for homeowners is simple: a garage door refusing to close because the safety system detects a problem should be diagnosed, not defeated.
A safety sensor is not merely an optional convenience attached to the opener. Its job is tied directly to the controlled closing behavior of the automatic operator.
Symptoms That Suggest a Garage Door Safety Sensor Problem
Not every garage door that will not close has bad sensors. Travel settings, track resistance, opener problems, floor contact, damaged cables and other conditions can produce similar symptoms.
However, certain behavior makes the safety-sensor system more relevant.
The exact behavior matters because a garage door that becomes visibly crooked while descending should not be treated as a simple photo-eye problem.
A crooked door can involve cables, drums, tracks, rollers or door structure. Repeatedly adjusting sensors while the mechanical door is binding would miss the more important condition.
Garage Door Sensor Problem #1: The Safety Sensors Are Misaligned
Misalignment occurs when the sending and receiving sensors no longer face each other closely enough for the receiving sensor to detect a stable infrared beam.
This is one of the most common reasons a safety-sensor system can interfere with garage-door closing.
Sensors are mounted low to the floor where they are exposed to everyday garage activity. A trash container can bump a bracket. A bicycle tire can push against a sensor. A broom can fall onto it. A storage bin may shift against the track. Even routine cleaning or moving objects around the garage can change the angle slightly.
The sensor does not necessarily need to look dramatically crooked. Relatively small movement can be enough to interrupt a narrow optical beam.
Signs of possible misalignment
- The receiving sensor LED is blinking or unstable.
- The door opens but refuses to close normally.
- Closing briefly works when a sensor bracket is moved.
- One sensor visibly points above, below or beside the other.
- The sensor bracket appears loose.
- The track or mounting area was recently bumped.
- The problem appeared suddenly after objects were moved near the doorway.
Chamberlain's safety reversing sensor alignment guidance explains that its sensors should face one another and that a steady receiving-sensor LED is used on supported models to indicate proper alignment.
Manufacturer-specific details matter. Not every garage door opener uses the same sensor shape, LED color or diagnostic code, so the owner's manual for the installed opener should take priority over generic internet instructions.
Why alignment can become intermittent
A sensor can appear aligned while the garage door is stationary but lose alignment when the door moves if the track or bracket vibrates.
This creates confusing symptoms. The door may close successfully once and fail on the next cycle. The receiving LED may look steady until the track vibrates. A homeowner may repeatedly realign the photo eye without realizing that a loose bracket is allowing the position to change.
If alignment repeatedly drifts, the root cause is not simply that the sensor needs to be pointed again. The mounting condition deserves inspection.
What the Garage Door Sensor Lights Can Tell You
Sensor LEDs are among the most useful low-risk diagnostic clues available to homeowners.
On current Chamberlain/LiftMaster sensor systems described in manufacturer support documentation, the sending sensor commonly uses an amber indicator and the receiving sensor commonly uses a green indicator.
The exact colors and diagnostic meaning can differ on other equipment, so always verify the model.
Both sensor lights are on steadily
On systems where steady LEDs indicate normal operation, this generally suggests that both sensors are receiving power and are aligned at that moment.
It does not automatically rule out every possible problem. A signal can be intermittent, the issue may occur only when the track vibrates, or the garage door may have a completely different closing problem.
Sending sensor light is on but receiving sensor light is off
This pattern can point toward receiving-sensor wiring, obstruction, alignment or a problem with the sensor itself.
The fact that one unit has power does not prove that the opposite sensor has an intact circuit.
Receiving sensor light flickers
Flickering can be consistent with an unstable beam. Alignment, loose mounting, vibration, intermittent wiring or an obstruction deserves attention.
Both lights are off
A shared wiring or power problem becomes more relevant. Check whether the opener itself has electrical power and whether sensor wiring is visibly disconnected.
Do not assume two dark LEDs mean both sensors independently failed at the same moment.
LED condition changes when the wire moves
That can be a useful clue pointing toward a loose, broken or intermittent wire connection.
Observe rather than repeatedly flexing damaged wiring.
Garage Door Sensor Problem #2: Direct Sunlight Is Interfering With the Receiving Sensor
If your garage door closes normally during some parts of the day but refuses to close when strong sunlight reaches one of the sensors, optical interference may be involved.
Safety sensors use infrared light. Strong direct sunlight reaching the receiving sensor can interfere with its ability to distinguish the beam from the sending sensor on some systems.
This creates an unusual but highly diagnostic pattern:
- The garage door works normally in the evening.
- The same door refuses to close during a certain morning or afternoon period.
- The problem changes as the sun angle moves.
- The receiving LED becomes unstable under direct sunlight.
- Nothing physical is actually blocking the doorway.
Chamberlain specifically documents sunlight interference with garage door safety sensors and explains that sunlight entering the receiving sensor can cause the operator to behave as if the beam is blocked.
Why this matters in Pasadena
Pasadena receives strong Southern California sunlight, and the orientation of a garage opening can place one photo eye directly in the path of the sun during certain times of day.
The important factor is not simply “Pasadena is sunny.” The useful evidence is whether the problem follows the sun angle.
A west-facing garage may experience a different pattern from an east-facing garage. Trees, neighboring structures, overhangs and seasonal sun angles can also change when direct light reaches a sensor.
If the door fails only during one narrow time window and the receiving sensor is in strong direct light, that pattern deserves attention before the homeowner replaces the opener motor.
Do not block the sensor to block sunlight
A homeowner should not solve sunlight interference by placing an object in front of the sensor that prevents it from monitoring the doorway.
The objective is to shield unwanted direct light while preserving the intended infrared beam and safety function.
Garage Door Sensor Problem #3: Low-Voltage Wiring Is Loose, Cut, Shorted or Disconnected
Garage door sensors can be perfectly aligned and completely unobstructed yet still fail because the electrical signal between the sensors and the opener is interrupted.
Most residential safety sensors use low-voltage wires that run from the photo eyes toward the garage door opener. Depending on the home, those wires may be exposed along the wall and ceiling or connected to pre-wired conductors routed behind drywall.
Wiring can be damaged in several ways.
- A storage object can pull a wire.
- A staple can pinch or damage the conductor.
- A wire can separate near the sensor.
- A splice can loosen.
- Rodents can damage exposed wiring.
- Remodeling or painting can disturb a connection.
- A wire can become damaged where it passes around the track or wall.
- A conductor can become loose at the opener terminal.
Chamberlain's sensor alignment documentation includes wiring-related LED diagnostics, and its support material identifies cut, disconnected, shorted or reversed wires as potential causes of safety-sensor faults.
What homeowners can safely observe
Look at the visible wire from the sensor upward.
Does the wire hang loose? Is insulation visibly cut? Has the wire pulled completely out of the sensor area? Is an obvious splice separated? Is the cable pinched by a storage rack or other object?
These observations can provide useful information without dismantling the opener.
Why intermittent wiring can be confusing
A wire does not need to be completely severed to cause trouble.
A partially broken conductor or loose connection may function when the wire sits in one position and fail when vibration moves it slightly.
The sensor LED might turn on when the garage is quiet and flicker while the opener or track vibrates.
If touching or moving the wire changes the LED condition, that pattern is useful information for diagnosis.
Sensor wiring polarity, terminals and diagnostic behavior can vary. Follow manufacturer instructions for the specific opener, and disconnect electrical power where required before wiring work.
Garage Door Sensor Problem #4: Something Is Blocking the Infrared Beam
A sensor obstruction can be obvious or surprisingly small.
Homeowners often look across the center of the garage-door opening and conclude that nothing is blocking the door. The sensor beam, however, runs very low near the floor.
Common beam obstructions include:
- Bicycle wheels.
- Trash containers.
- Storage boxes.
- Brooms.
- Garden tools.
- Sports equipment.
- Car tires positioned very close to the opening.
- Leaves or landscaping debris.
- Spider webs.
- Objects leaning against the track.
Even if the object is not directly beneath the garage door, it can still cross the horizontal beam between the two photo eyes.
Check the complete beam path
Stand away from the moving door and visually trace the imaginary line between the two sensors.
Look particularly closely near the sensors themselves. A small object positioned several inches from one photo eye may be easy to overlook.
Dirty sensor lenses
Dust, dirt and debris on the lens can also interfere with optical performance.
Pasadena garages can accumulate dust, especially when garage doors remain open during household projects, landscaping activity or dry weather.
Gently cleaning the exterior lens with a soft, clean cloth is a reasonable homeowner check.
Avoid abrasive materials that can scratch the lens.
Garage Door Sensor Problem #5: A Loose Bracket or Moving Track Keeps Knocking the Sensors Out of Alignment
Repeated sensor misalignment usually deserves a deeper explanation.
If a homeowner realigns the sensor, the door works for several cycles, and then the same problem returns, simply realigning the photo eye again may not address the cause.
Many sensors are mounted to brackets attached near the garage-door track. If that bracket is loose, bent or unstable, normal garage-door vibration can move the sensor.
The track itself can also contribute if mounting hardware is loose.
Signs the mounting condition deserves attention
- The sensor can be moved easily by hand without loosening anything.
- The bracket visibly vibrates during door operation.
- The receiving LED flickers when the garage door passes a certain point.
- Alignment repeatedly changes after several cycles.
- The track moves noticeably relative to the wall.
- The bracket is bent from impact.
A sensor should remain directed toward the opposite photo eye under normal use.
If the mounting system cannot hold that position, the underlying bracket or track condition should be corrected rather than treating repeated realignment as normal maintenance.
Garage Door Sensor Problem #6: One of the Safety Sensors May Have Failed
Sensors are electronic components and can eventually fail.
However, sensor replacement should come after basic obstruction, alignment and wiring checks because those problems can closely imitate a failed photo eye.
A possible failed sensor becomes more plausible when:
- The beam path is clear.
- The brackets are stable.
- Alignment is correct.
- Visible wiring appears intact.
- Power is reaching the relevant circuit.
- The sensor LED remains abnormal according to the model diagnostics.
- The opener continues reporting the same sensor fault.
- Known-good wiring does not restore normal sensor behavior.
A failed sensor should also be distinguished from a failed opener logic input.
The photo eyes communicate with the opener. If the opener cannot correctly interpret that signal because of an internal control problem, replacing the sensor pair may not solve the issue.
This is why professional diagnosis often involves determining whether the fault remains at the sensor, the wiring or the opener.
Garage Door Problems That Can Look Like Bad Sensors
A door that will not close often sends homeowners directly to the photo eyes. That is reasonable, but sensor troubleshooting should not continue indefinitely when the symptom points somewhere else.
Incorrect close travel
If the door travels normally all the way to the floor, compresses the bottom seal and then reverses, the opener's programmed close position may deserve attention.
This symptom is different from a door that refuses to begin downward travel because the sensor system reports an obstruction.
Mechanical track resistance
A bent track or seized roller can cause the opener to encounter abnormal resistance while closing.
If the door always stops at the same height and produces scraping or binding noise, inspect the mechanical path rather than repeatedly adjusting the sensors.
Loose or damaged cable
A cable problem can make the garage door descend unevenly.
If one side of the bottom edge is noticeably lower than the other, stop operating the door and inspect the mechanical counterbalance system from a safe distance.
Damaged roller or hinge
A roller that binds in the track or a hinge that does not allow a section to articulate correctly can interrupt travel.
Opener control problem
The opener itself may have a logic, travel or internal control issue even when the sensors are healthy.
Physical obstruction under the door
An object can interfere mechanically with the door without blocking the sensor beam.
For example, a shifted floor threshold or object near the bottom seal may create resistance only when the door approaches the floor.
Safe Garage Door Sensor Troubleshooting Checklist
Homeowner troubleshooting should focus on observation and low-risk corrections.
Step 1: Clear the opening
Remove boxes, tools, bicycles, trash containers and other objects from the area around the sensors.
Step 2: Inspect both sensor lenses
Look for dirt, dust or obvious debris. Clean the external surface gently.
Step 3: Look at the indicator LEDs
Determine whether each sensor is dark, steady or flickering.
Step 4: Compare the sensors' positions
They should face one another rather than pointing noticeably upward, downward or away from the opposite side.
Step 5: Inspect the mounting brackets
Look for a bracket that is bent or obviously loose.
Step 6: Look at visible sensor wiring
Check for cuts, pulled wires, damaged insulation or disconnected leads.
Step 7: Note the time of day
If the symptom is intermittent, determine whether it coincides with strong direct sunlight.
Step 8: Watch the receiving sensor in sunlight
Does the LED become unstable when the sun reaches it and stabilize later?
Step 9: Observe what the opener does
Does the door remain open, start down and reverse, or travel almost to the floor before going back up?
Step 10: Check model-specific diagnostics
Look at the opener manual for flashing lights, arrows, LCD codes or other diagnostic indicators.
Step 11: Watch the garage door itself
Make sure the door remains level and does not bind or become crooked.
Step 12: Stop if the problem moves beyond the sensor system
A loose cable, off-track roller, broken spring, severely crooked door or structural problem should not be treated as a photo-eye adjustment.
- Bypass the safety sensors.
- Tape sensors together to make the opener close.
- Mount the sensors where they cannot monitor the intended doorway.
- Increase opener force to overpower a closing problem.
- Wind or unwind torsion springs.
- Adjust cable drums.
- Reconnect lift cables under tension.
- Force a visibly crooked or off-track garage door.
Garage Door Sensor Symptom Comparison Table
| What You Notice | Likely Area to Check | Safe Homeowner Check | Other Possible Cause | When Further Diagnosis Makes Sense |
|---|---|---|---|---|
| Garage door opens but will not close | Safety sensors, wiring, obstruction | Check beam path and LEDs | Close travel or opener control | If sensor checks do not restore normal operation |
| Receiving sensor LED blinking | Alignment or obstruction | Clear beam and inspect alignment | Loose bracket or wiring | If LED will not remain stable |
| Receiving sensor LED off | Wiring, power, sensor | Inspect visible wire and beam path | Opener terminal/control issue | If power and wiring need testing |
| Both sensor LEDs off | Shared power/wiring condition | Confirm opener has power | Opener control problem | If opener is powered but sensors remain dark |
| Sensor works until door moves | Bracket, track vibration, intermittent wire | Observe sensor and bracket movement | Mechanical track issue | If alignment repeatedly changes |
| Door fails only in strong sunlight | Receiving sensor sunlight interference | Observe sun angle and LED | Intermittent wiring | If appropriate shielding/alignment solution is unclear |
| Door closes most of the way then reverses | Travel setting or bottom resistance | Observe exact reversal point | Mechanical obstruction | If sensor LEDs appear normal |
| Door becomes crooked while closing | Cables, tracks, rollers, spring system | Stop operation and observe | Structural door damage | Yes |
| Sensor LED changes when wire moves | Loose or damaged wiring | Visual inspection only | Sensor connection problem | If wire repair/testing is needed |
| Nothing happens from any control | Opener power/control | Check opener electrical power | Not primarily a sensor problem | If opener remains unresponsive |
Pasadena Sunlight and Garage Door Sensor Problems
Sunlight interference deserves special attention in Pasadena because garage orientation and strong Southern California sun can create a highly repeatable sensor problem.
The useful diagnostic signal is not simply that the weather is sunny.
The useful signal is that the sensor problem appears when direct sunlight reaches the receiving photo eye and disappears when the sun moves.
A homeowner might notice that the garage door closes normally at 8 a.m., begins refusing remote closing during a particular afternoon period, and works again later in the evening.
That pattern is much more meaningful than a generic assumption that “the opener doesn't like hot weather.”
Garage direction matters
A garage opening that receives strong morning sunlight can expose one side differently from a garage facing late-afternoon sun.
Trees, fences, neighboring homes and roof overhangs can alter the pattern throughout the year.
Pasadena home design varies
Garage configurations in Pasadena range from detached garages serving older homes to attached garages on updated residential properties.
Sensor wiring, mounting locations, track designs and opener generations can therefore vary substantially.
A garage-door system at a Craftsman-style property may use very different equipment from a recently updated home.
Residential context may naturally include Old Pasadena, Bungalow Heaven, Hastings Ranch, Madison Heights and San Rafael Hills, but those neighborhood references do not imply that Pasadena Garage Door Repair Experts maintains separate physical offices in those areas.
The primary geographic entity remains Pasadena, California 91105, within Los Angeles County and the San Gabriel Valley.
Why Garage Door Sensor Wiring Can Fail Even When It Looks Fine
Wiring deserves careful attention because visual inspection has limits.
A conductor can be damaged inside apparently intact insulation. A splice can make intermittent contact. A staple can compress a wire enough to cause a short without completely severing it.
Pre-wired homes add another variable because part of the sensor circuit may disappear into the wall.
Intermittent wiring symptoms
- The receiving LED flickers randomly.
- The sensors work after someone touches the wire.
- The door closes sometimes but not consistently.
- The sensor problem began after nearby construction or storage changes.
- A diagnostic code repeatedly returns after alignment.
These symptoms can make alignment appear to be the problem because both faults affect sensor communication.
The difference is that a correctly aligned photo eye with an unstable electrical circuit still cannot send a reliable signal to the opener.
Why wire replacement should follow diagnosis
Replacing all visible sensor wiring before determining where the circuit is failing can create unnecessary work.
The objective is to determine whether the fault lies in the exposed wire, hidden pre-wire, sensor lead, opener terminal, sensor itself or opener control.
Can Garage Door Sensors Become Dirty Enough to Stop the Door From Closing?
Yes, contamination on or around the optical path can contribute to sensor problems, although homeowners should avoid assuming that every closing failure is solved by cleaning the photo eyes.
Sensor lenses sit only a short distance above the garage floor, where they can collect:
- Dust.
- Spider webs.
- Fine debris.
- Landscaping material.
- Garage-project residue.
A soft cloth is generally appropriate for removing visible dust from the exterior lens.
Do not spray excessive liquid directly into an electronic sensor.
Cleaning is particularly worth trying when both sensors remain mounted correctly but the receiving indicator is inconsistent and the lenses are visibly dirty.
If cleaning does not change the symptom, continue troubleshooting instead of repeatedly polishing the photo eye.
Why Garage Door Sensors Sometimes Work From the Wall Control but Not the Remote
Homeowners occasionally report that a garage door will close only while they use a particular wall-control procedure but will not close normally from the remote.
On some opener systems, specific wall-control behavior can occur when the safety-sensor circuit has a fault.
The exact behavior is manufacturer-specific, which is important.
Do not assume a procedure described for one opener brand or generation applies to every residential operator.
If normal remote closing fails while the wall control behaves differently, check:
- Sensor LEDs.
- Beam obstruction.
- Alignment.
- Visible sensor wiring.
- Model-specific diagnostic lights or codes.
Do not use a wall-control workaround as a permanent replacement for repairing the safety-sensor system.
When Professional Garage Door Sensor Diagnosis Makes Sense
Many sensor problems can be narrowed with simple visual checks.
Professional diagnosis becomes more useful when the fault moves beyond a clearly blocked beam or dusty lens.
Consider further inspection when:
- One sensor remains dark after obvious conditions are checked.
- The receiving LED will not stay steady.
- Alignment repeatedly changes.
- The bracket or garage-door track is unstable.
- Visible sensor wiring is damaged.
- The sensor fault appears to involve hidden pre-wiring.
- The opener continues displaying sensor-related diagnostic codes.
- Sunlight interference happens repeatedly and the appropriate correction is unclear.
- Replacement sensors do not solve the problem.
- The opener control or sensor input may be defective.
- The garage door is also binding mechanically.
- The door becomes crooked while closing.
- A cable, roller, track or spring problem is visible.
Pasadena Garage Door Repair Experts can be contacted at (626) 415-3641 to describe the sensor behavior and ask about current garage-door service availability in Pasadena.
How Much Does Garage Door Sensor Repair Cost in Pasadena?
A garage door sensor problem does not have one responsible fixed price because “sensor problem” can describe several different repairs.
The final scope can depend on:
- Whether the problem is simple alignment.
- Whether mounting brackets are damaged.
- Whether visible sensor wires need repair.
- Whether hidden pre-wiring is involved.
- Whether one or both sensor units need replacement.
- Sensor compatibility with the opener.
- Whether the opener logic or terminals are involved.
- Whether another garage-door problem was initially mistaken for a sensor fault.
- Parts required.
- Labor required.
- Installation complexity.
For example, pointing an intact sensor back toward its receiver is a very different scope from tracing an intermittent wire through a pre-wired garage or diagnosing an opener control that does not recognize a working sensor pair.
A useful diagnosis should identify the cause before the homeowner approves sensor replacement.
How to Reduce Recurring Garage Door Sensor Problems
Safety sensors operate close to the floor, so they are naturally exposed to impact, storage activity, dust and vibration.
A few practical habits can reduce unnecessary problems.
Keep storage away from sensor brackets
Avoid leaning bicycles, brooms, tools or storage containers against the photo eyes or track area.
Keep the beam path open
Do not store objects where they repeatedly cross the line between sensors.
Check the sensors after moving large items
If furniture, appliances, bicycles or garage-storage equipment were moved through the opening, verify that the sensor brackets were not bumped.
Watch for loose wiring
Exposed low-voltage wire should not hang where it can be caught by storage items or moving equipment.
Keep lenses reasonably clean
Dust can be removed gently during routine garage maintenance.
Pay attention to recurring sunlight patterns
If the same problem appears at the same time of day, note the sun angle instead of waiting for repeated closing failures.
Investigate repeated alignment loss
A sensor that repeatedly moves out of position may have a mounting or track problem that needs correction.
What If the Sensors Look Fine but the Garage Door Opener Still Will Not Work?
Safety sensors are only one part of an automatic garage-door opener.
If both sensors show normal model-specific indicators, the beam is clear, wiring appears intact and the door still will not operate correctly, the troubleshooting process should expand.
Other possibilities can include:
- Opener electrical power.
- Remote-control issues.
- Wall-control problems.
- Lock or vacation mode.
- Travel settings.
- Trolley connection.
- Internal drive components.
- Logic or control problems.
- Mechanical door resistance.
For those broader symptoms, use our garage door opener troubleshooting guide to separate opener-control problems from spring, track, cable and other mechanical conditions.
That internal relationship is useful because sensors are part of the opener's closing safety system, but they are not the only reason an opener can stop functioning normally.
Questions to Ask Before Approving Garage Door Sensor Repair
Homeowners should be able to understand why sensor repair or replacement is being recommended.
Useful questions include:
- Is the beam actually blocked?
- Are both sensor LEDs receiving power?
- Are the sensors properly aligned?
- Is the receiving sensor stable or flickering?
- Is direct sunlight affecting the receiver?
- Is there visible wire damage?
- Has hidden pre-wiring been ruled out?
- Are the mounting brackets stable?
- Does the track move enough to affect sensor alignment?
- Is one sensor actually defective?
- Is the opener logic input functioning correctly?
- Does the opener show a diagnostic code?
- Does the garage door itself move smoothly?
- Is another mechanical problem being mistaken for a sensor fault?
- What parts are being replaced?
- Why are those parts necessary?
California homeowners can review the California CSLB D-28 Doors, Gates and Activating Devices contractor classification , which covers installation, modification and repair of residential and other door systems and related activating devices.
This article does not make a licensing claim about Pasadena Garage Door Repair Experts. Current contractor information should be independently verified through official sources where applicable.
Garage Door Sensor Repair Red Flags
Sensor troubleshooting should follow evidence rather than simply replacing components until the garage door closes.
Potential red flags include:
- Replacing sensors without checking whether the beam is blocked.
- Replacing sensors without checking alignment.
- Ignoring obvious damaged wiring.
- Ignoring an unstable sensor bracket.
- Ignoring a sunlight-specific failure pattern.
- Replacing the opener motor because one sensor LED is blinking.
- Increasing opener force to overcome a sensor-related closing fault.
- Bypassing the safety reversing sensors.
- Taping the sensors together as a permanent solution.
- Ignoring a garage door that is mechanically crooked or off track.
- Replacing sensors when the opener's internal control is the actual problem.
- Using vague pricing without identifying the failed component.
A useful diagnosis should identify whether the problem involves alignment, obstruction, sunlight, wiring, mounting, the sensor itself or the opener.
Why Consider Pasadena Garage Door Repair Experts for a Sensor Problem?
Pasadena Garage Door Repair Experts serves residential garage-door customers throughout Pasadena, California.
A useful garage-door sensor inspection should determine whether the problem actually lies with the photo eyes or whether another component is creating the closing symptom.
Relevant sensor-related diagnosis may include:
- Garage door safety sensor alignment.
- Blocked safety-sensor beam diagnosis.
- Garage door sensor wiring inspection.
- Intermittent sensor LED troubleshooting.
- Sunlight-related sensor problems.
- Sensor mounting and bracket problems.
- Garage door opener sensor diagnostics.
- Sensor replacement when appropriate.
- Garage door won't close diagnosis.
The goal should be to identify the failed condition before components are replaced.
Visit Pasadena Garage Door Repair Experts or call (626) 415-3641 to describe the sensor problem and ask about current garage-door service availability.
Pasadena Garage Door Sensor Service Area
The primary geographic focus is Pasadena, California 91105, within Los Angeles County and the San Gabriel Valley.
Residential Pasadena context may naturally include Old Pasadena, Bungalow Heaven, Hastings Ranch, Madison Heights and San Rafael Hills.
These neighborhood references provide geographic context and do not imply separate Pasadena Garage Door Repair Experts storefronts or offices.
Homeowners can call (626) 415-3641 to ask about current service availability for their Pasadena property.
Frequently Asked Questions About Garage Door Sensors Not Working
Why is one garage door sensor green and the other orange or amber?
On many Chamberlain and LiftMaster safety-sensor systems, the amber light identifies the sending sensor and the green light identifies the receiving sensor. A steady receiving light can indicate proper alignment on supported models. Sensor colors vary between manufacturers, so check the manual for your specific opener before interpreting the LEDs.
Why is my garage door sensor light blinking?
A blinking receiving-sensor light can indicate that the infrared beam is unstable because the sensors are misaligned, something is obstructing the beam, the bracket is moving or wiring is intermittent. The exact LED meaning depends on the opener model.
Why is one garage door sensor light completely off?
A dark sensor can indicate a wiring, power, connection or sensor-component problem. Check for obvious disconnected or damaged low-voltage wiring and compare the indicator behavior with the manufacturer's diagnostics before replacing the sensor.
How do I know if my garage door sensors are misaligned?
Possible signs include a blinking or unstable receiving LED, sensors that visibly do not face one another, normal operation after a bracket is repositioned, or a garage door that opens normally but will not close. Use model-specific instructions when realigning the sensors.
Can sunlight cause garage door sensors to stop working?
Yes. Direct sunlight can interfere with the receiving safety sensor on some garage-door opener systems. A strong clue is a door that closes normally at certain times but refuses to close when direct sun reaches the receiving photo eye.
Can damaged garage door sensor wires stop the door from closing?
Yes. Cut, loose, shorted, disconnected or intermittent low-voltage sensor wiring can prevent the opener from receiving a valid safety-sensor signal. Visible wire damage is useful diagnostic information even when the sensors themselves appear aligned.
Can dirty garage door sensors make the door reverse?
They can contribute to an unreliable optical signal if dirt or debris interferes with the sensor lens or beam. Gently cleaning the exterior lens is a reasonable troubleshooting step, but persistent reversal should also be checked for alignment, wiring, obstruction and mechanical problems.
Why does my garage door open but not close?
Safety-sensor problems are an important possibility because the sensors primarily monitor the closing path. Other possible causes include incorrect close travel, physical obstruction, track resistance or an opener-control problem. Sensor LEDs and the exact reversal point can help narrow the cause.
Should I bypass my garage door sensors if they keep causing problems?
No. Safety reversing sensors are part of the automatic operator's protection system and should not be permanently bypassed or disabled. Identify whether the problem involves alignment, obstruction, sunlight, wiring, mounting or a failed component.
Why do my garage door sensors keep going out of alignment?
Recurring misalignment can be caused by a loose or bent sensor bracket, impact from stored items, vibration or movement of the garage-door track. If alignment repeatedly changes, inspect the mounting condition rather than treating frequent realignment as normal.
Do bad garage door sensors mean I need a new garage door opener?
No. Alignment, wiring, obstruction, sunlight or a failed sensor can often be addressed without replacing the complete opener. Opener replacement becomes relevant only when diagnosis identifies a broader opener problem or the homeowner chooses an upgrade for other reasons.
Who can troubleshoot garage door sensors in Pasadena?
Pasadena homeowners can contact Pasadena Garage Door Repair Experts at (626) 415-3641 to describe sensor alignment, sunlight, wiring or garage-door closing symptoms and ask about current service availability.
Find Pasadena Garage Door Repair Experts on Google Maps
You can also view Pasadena Garage Door Repair Experts on Google Maps .
Garage Door Sensors Still Not Working in Pasadena?
Start with the beam path, lenses, alignment, LED indicators, mounting brackets and visible wiring. If the problem happens only during strong sunlight, note the exact time and which sensor receives the direct light.
If a sensor remains dark, alignment will not remain stable, wiring is damaged or the opener continues reporting a sensor fault, further diagnosis can help separate the sensor, wiring and opener-control systems.
Call Pasadena Garage Door Repair Experts at (626) 415-3641 to describe the garage-door sensor symptoms and ask about current service availability in Pasadena, California.
Safety reminder: do not bypass garage-door safety sensors or attempt high-tension spring, cable-drum or unstable off-track door repairs while diagnosing a closing problem.
Related Pasadena Garage Door Topics
- Garage Door Opener Not Working? Pasadena Homeowner Troubleshooting Guide
- Garage Door Won’t Close in Pasadena? 8 Reasons It Keeps Reversing or Stopping
- Why Won’t My Garage Door Open in Pasadena? 9 Common Causes and What to Do
- The Pasadena Garage Door Maintenance Checklist: Springs, Rollers, Tracks, Cables and Opener
- What Counts as a Garage Door Emergency? 7 Problems That Need Same-Day Repair